
Course Outline
Getting Started - Xline
There's a few steps that will need to be completed before you can start using Indigo Pro to match your supplier invoices.
You'll need to import your list of suppliers, nominal codes, tax codes, and cost centres to Indigo Pro in .CSV format. (please ensure that the first line on your CSV file are the line headings)
Importing your Suppliers
To import your suppliers to Indigo Pro, first click the ⚙️ icon in the top right hand corner of the site, and go to "Company Settings".
From there click "Suppliers" on the left, and then "Import Suppliers" on the bottom of the window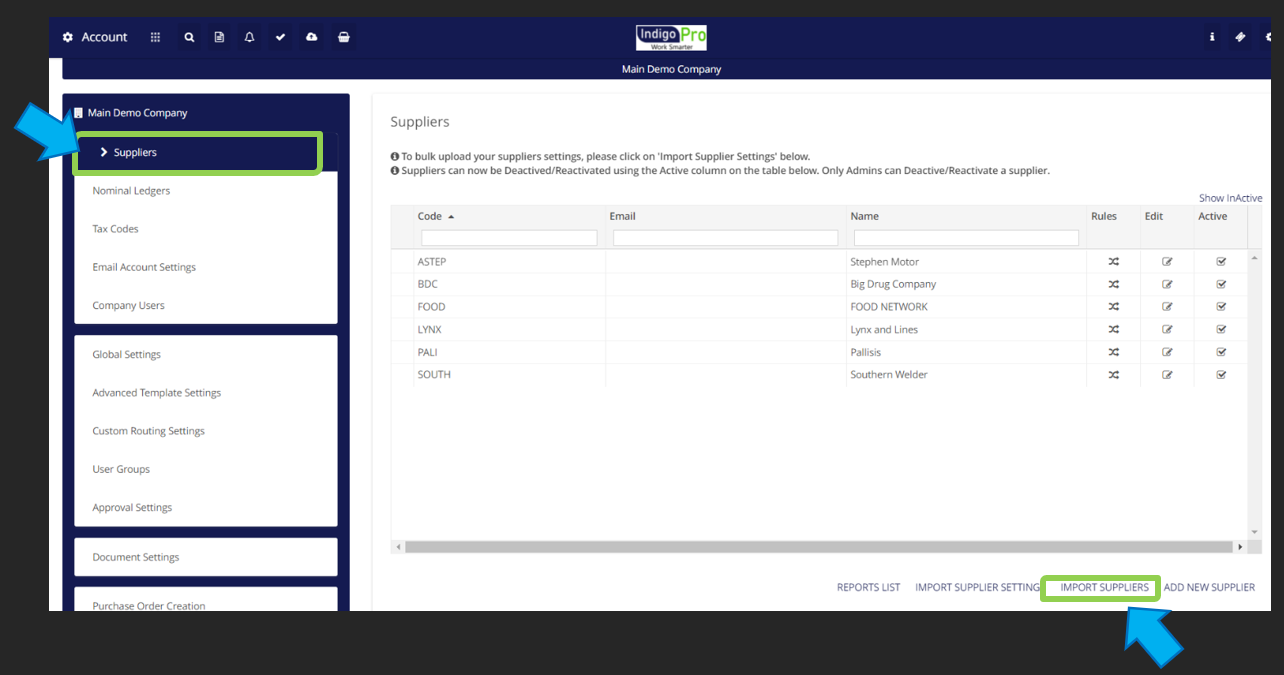
After clicking "import suppliers" you just need to select your Suppliers list CSV File, and map each field on the form to the corresponding header in your CSV file.

Finally click "Import Suppliers" to finish your import, and bring your suppliers into Indigo Pro. It make take some time depending on how many suppliers you're uploading into the system.
Importing Nominal Ledgers
Importing Nominal Ledgers into Indigo Pro works much the same as importing suppliers, just go to the settings menu, and select "Nominal Ledgers"
From the Nominal Ledgers screen, select "Import Nominal Ledgers" from the bottom of the window. after importing your CSV file, and mapping some of the fields to your headers, Indigo Pro will display a preview of the first 10 items in your CSV file to show you how how they'll be formatted in Indigo Pro,
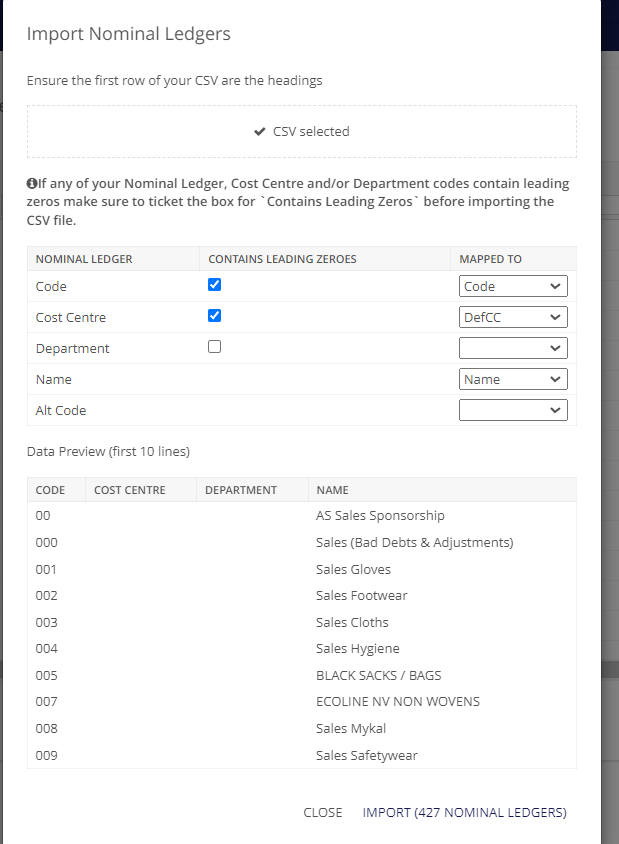
It's important to ensure that the preview matches how your nominal codes are setup in Intact, or else the Indigo pro outputs wont match up in Intact.
Importing Cost Centers
Importing your cost centres is the exact same as importing your suppliers or nominal codes, just go to the "Cost centers" tab in Indigo Pro ( below the nominal code section)
Click "Import Cost Centers", select the CSV file to upload, and map your fields as normal, it will display how many cost centres will be imported at the bottom of the box when you go to confirm.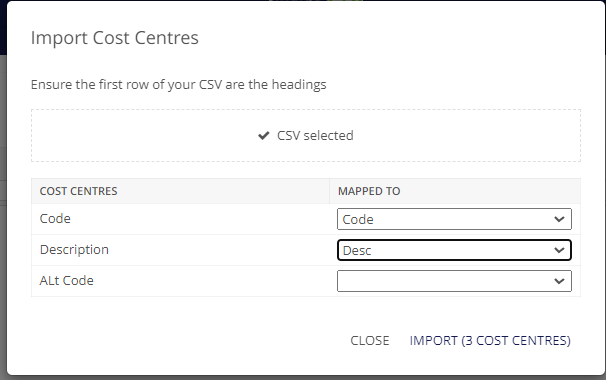
Not all of the fields are required, but if you're using cost centres then you should at least have the "Code" box populated.
Adding Tax Codes
Adding tax codes is a little different than adding your suppliers, nominals and cost centers, each tax code needs to be added manually into Indigo Pro.
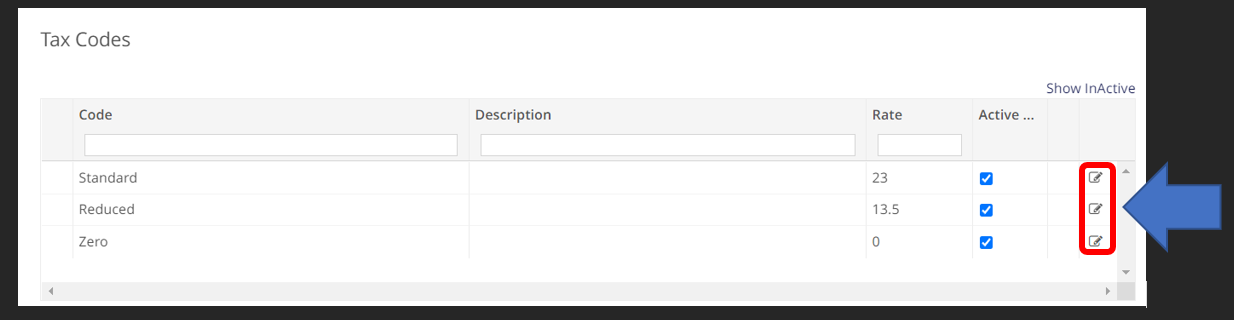
To get started, click "Tax Codes" from the left hand side of the company settings screen, and you'll be greeted with the following page:
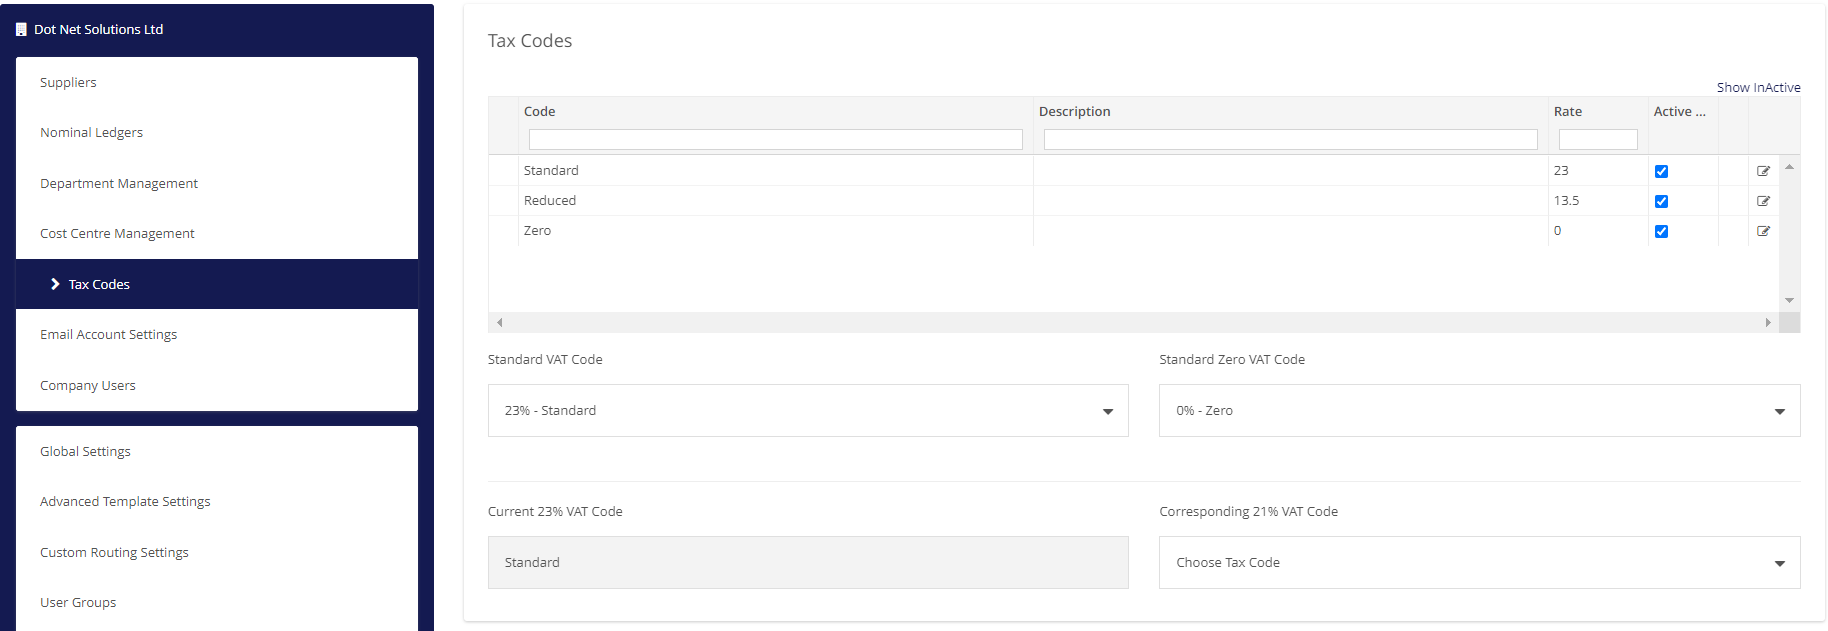
The tax codes in the screenshot above are the there by default, so you may need to just change the Code and the Description to match what you have for those tax codes in Intact; by clicking the icon on the right hand side of the tax code you want to change.
To add a new tax code, begin by clicking "Add New Tax Code" and then fill out the boxes with your tax code info as it appears in Intact:
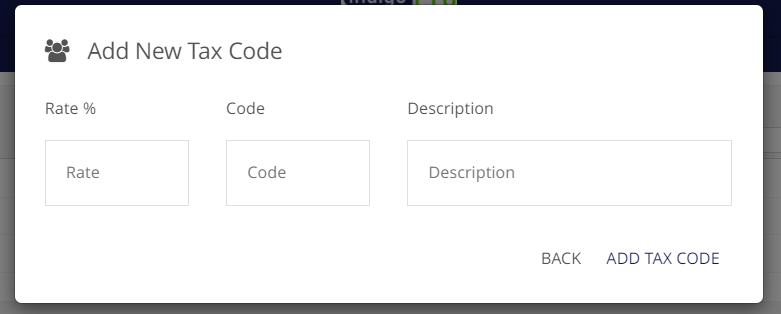
Click Add Tax Code when finished, and continue adding any tax codes that you'll need going forward.